It will take about 3 minutes to finish reading this article.
In iOS App development, users are often faced with various network environments. If you want a better experience, you must not only be able to run normally in a normal network environment, but also in a weak network environment.
Here are several ways to simulate a weak network environment.
1. The built-in network link regulator on iOS
The iOS settings come with a network regulator for development by default, which can be used to simulate a weak network environment. Open the phone system settings, scroll down, and find the Developer.
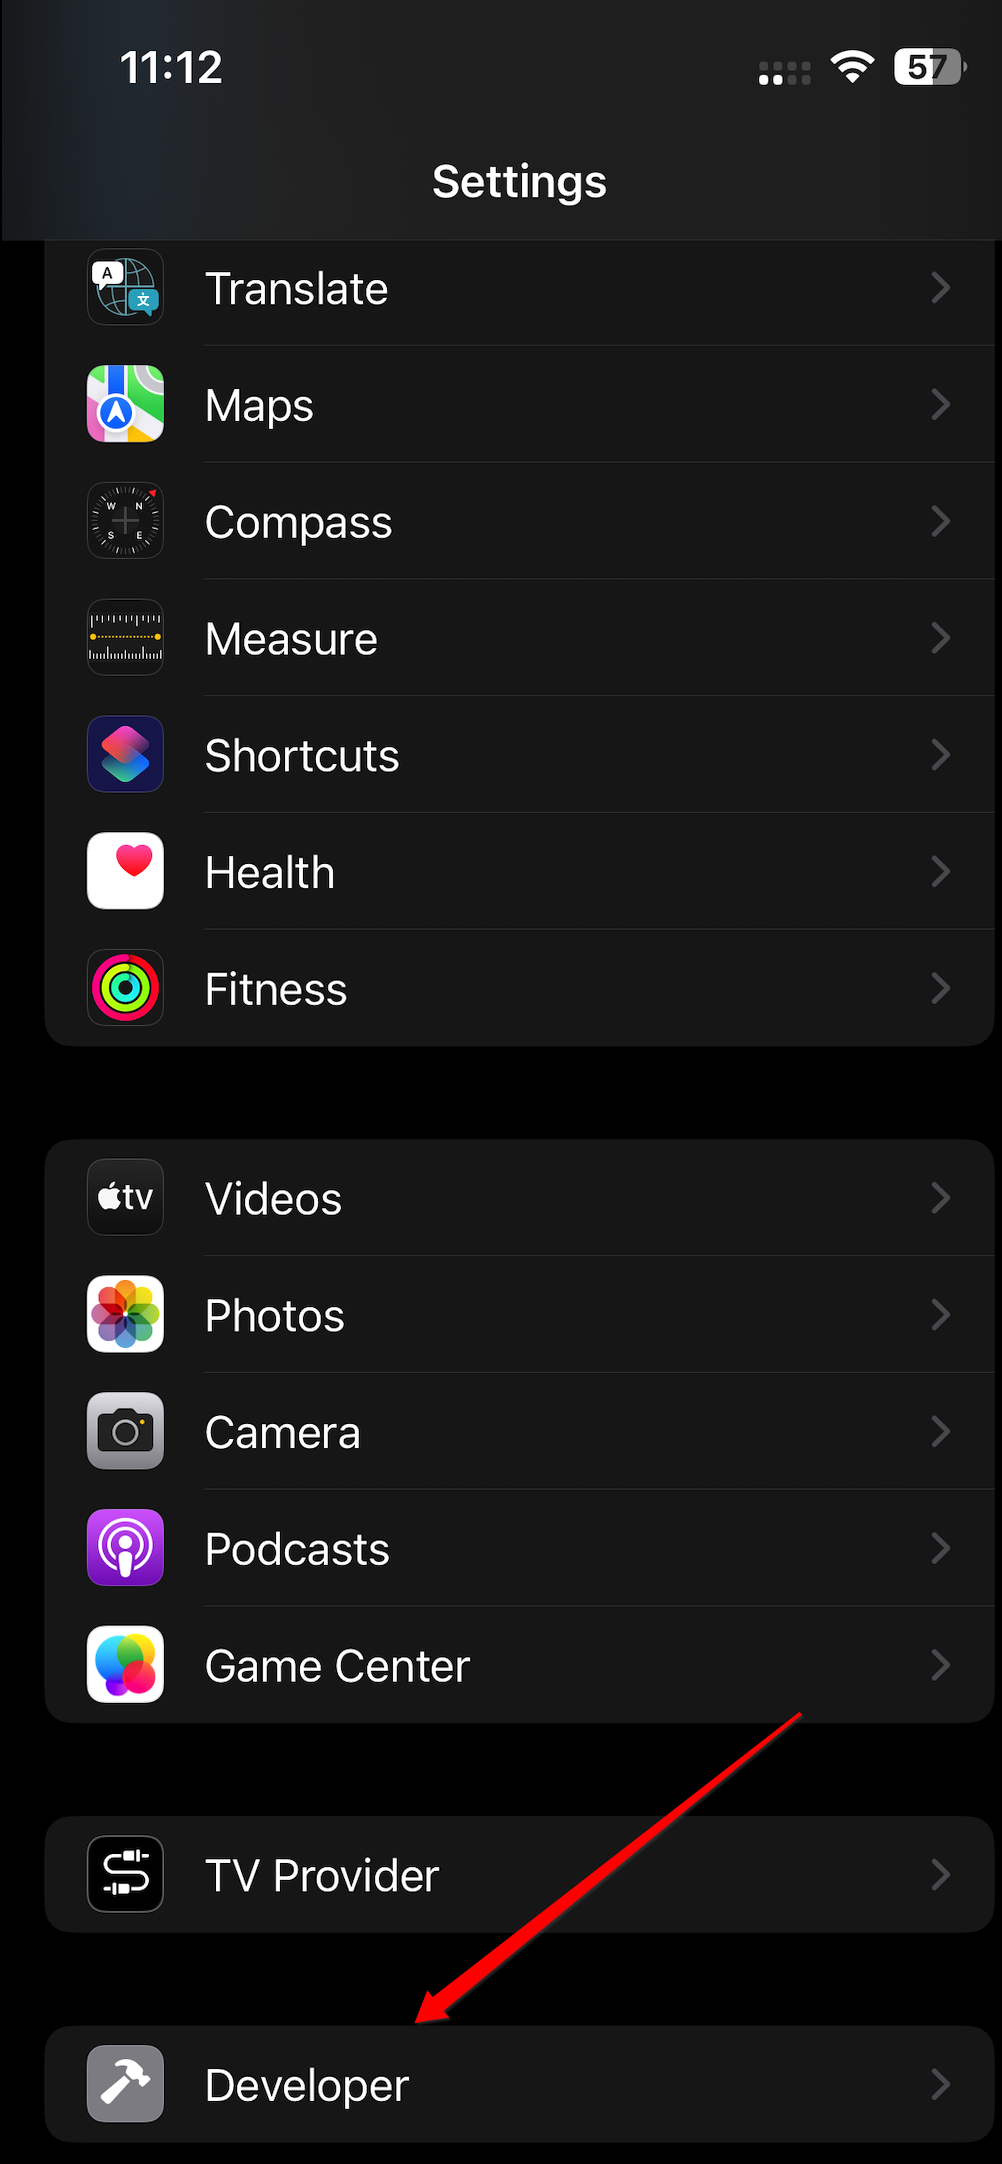
If you don’t see this option in your phone’s settings, you can open Xcode first, then connect it to your phone with a data cable, and you’ll see the developer options after a while.
Note: For iOS 16 and above, you need to turn on the developer mode in Privacy and Security in settings.
Click on the Developer and you can see the Network link Conditioner column. Click on it again to simulate various network scenarios.
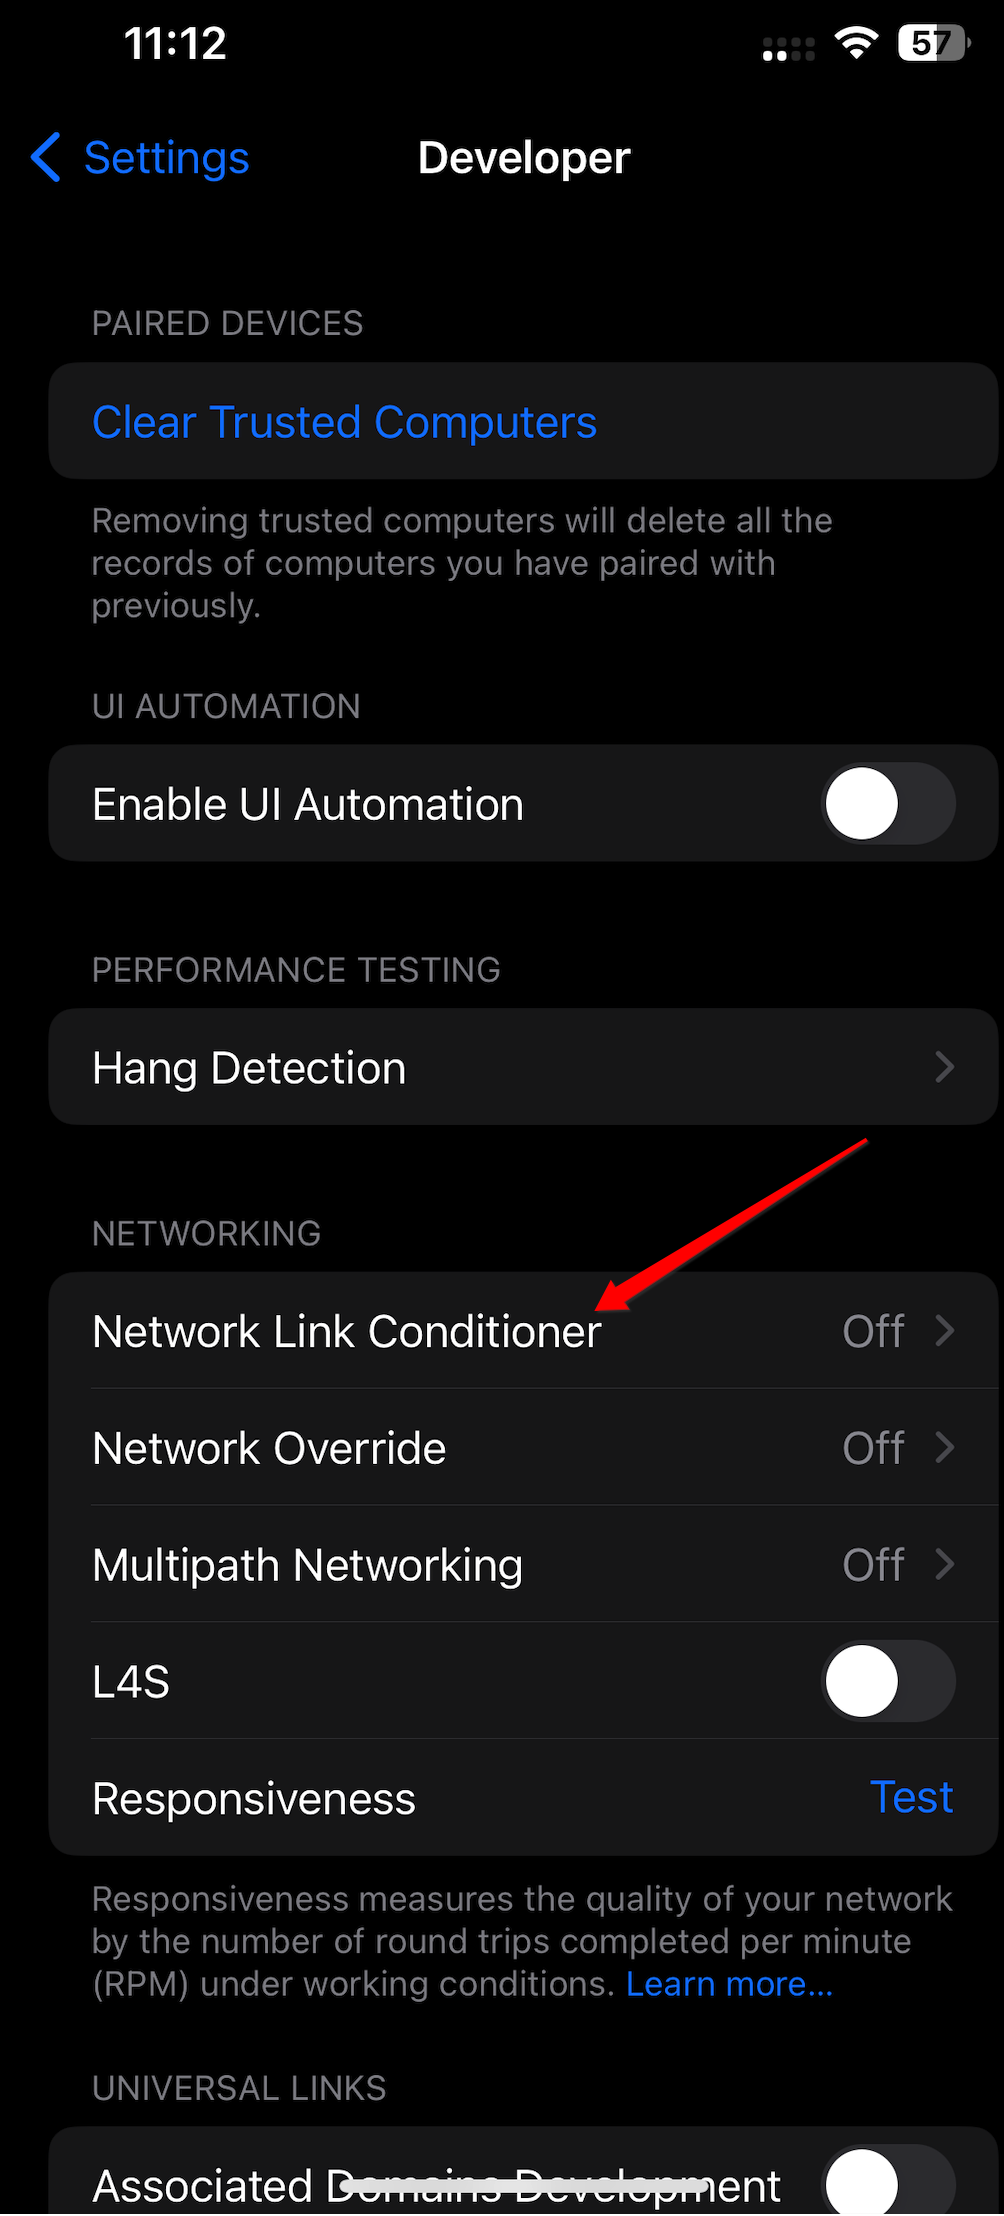
You can find some of the system’s default network configurations (100% loss, 3G network, Wi-Fi, etc.) on this page. First turn on the enable switch, and then click on one of the presets to select the default network.

Now you can test your app in this network state.
Click the information button to the right of the preset to see the specific parameters of this network configuration, but they cannot be modified.
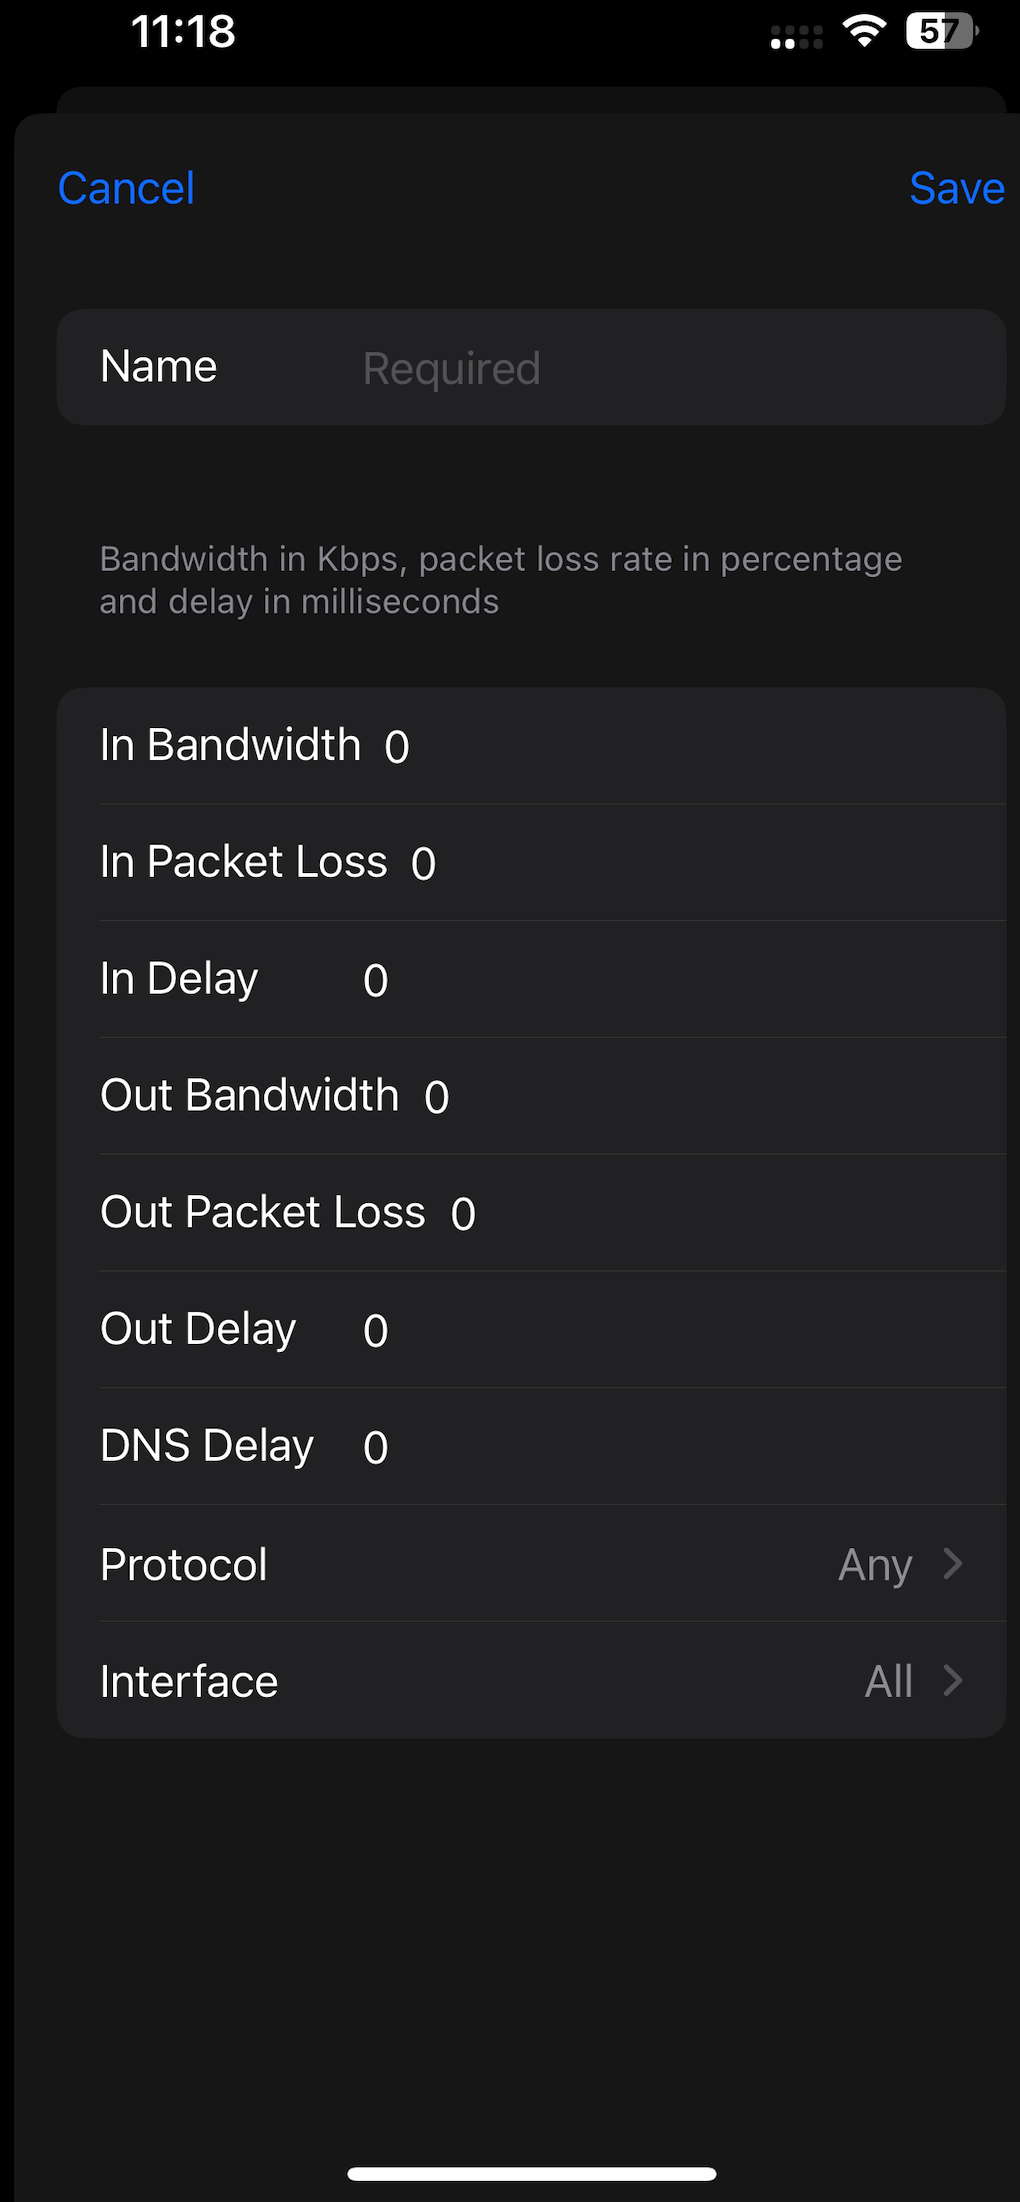
If these preset configurations cannot meet your needs, you can also click the Add a profile button below to customize a configuration. You can customize bandwidth, packet loss, delay and other parameters.
2. Use Charles to simulate a weak network
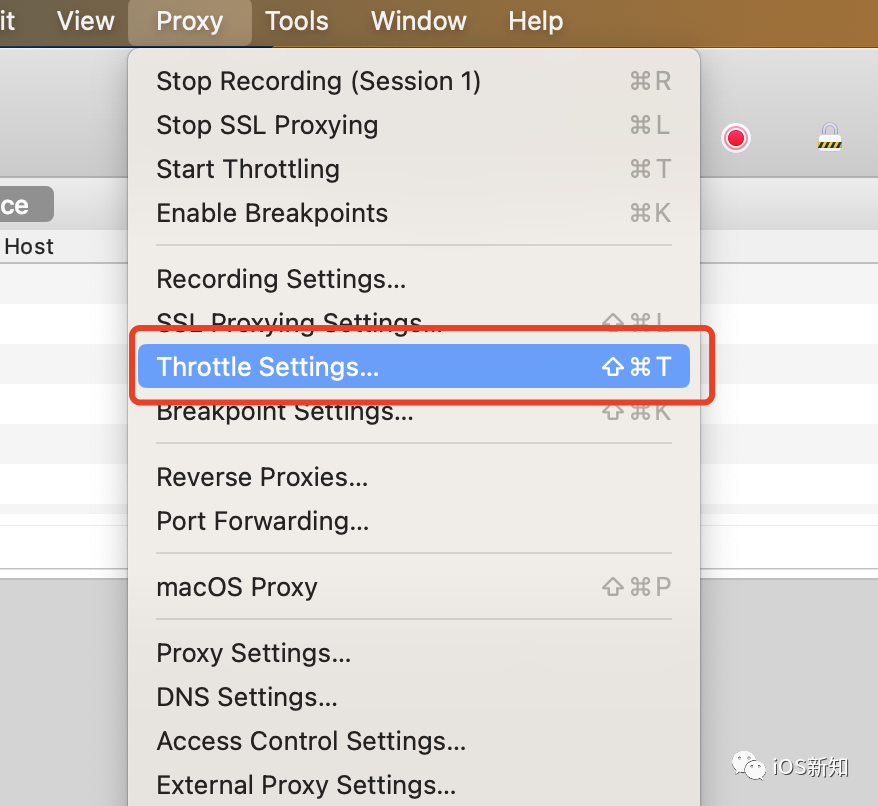
You can also use packet capture tools such as Charles to simulate weak networks. First, open the Charles client on your computer. After configuring the Proxy, select Proxy on the top toolbar, and then click Throttle Settings in the drop-down menu.
In the pop-up page, just make settings. You can directly select the Throttle preset option, or directly customize the values in the bandwidth, packet loss, etc. input boxes below.
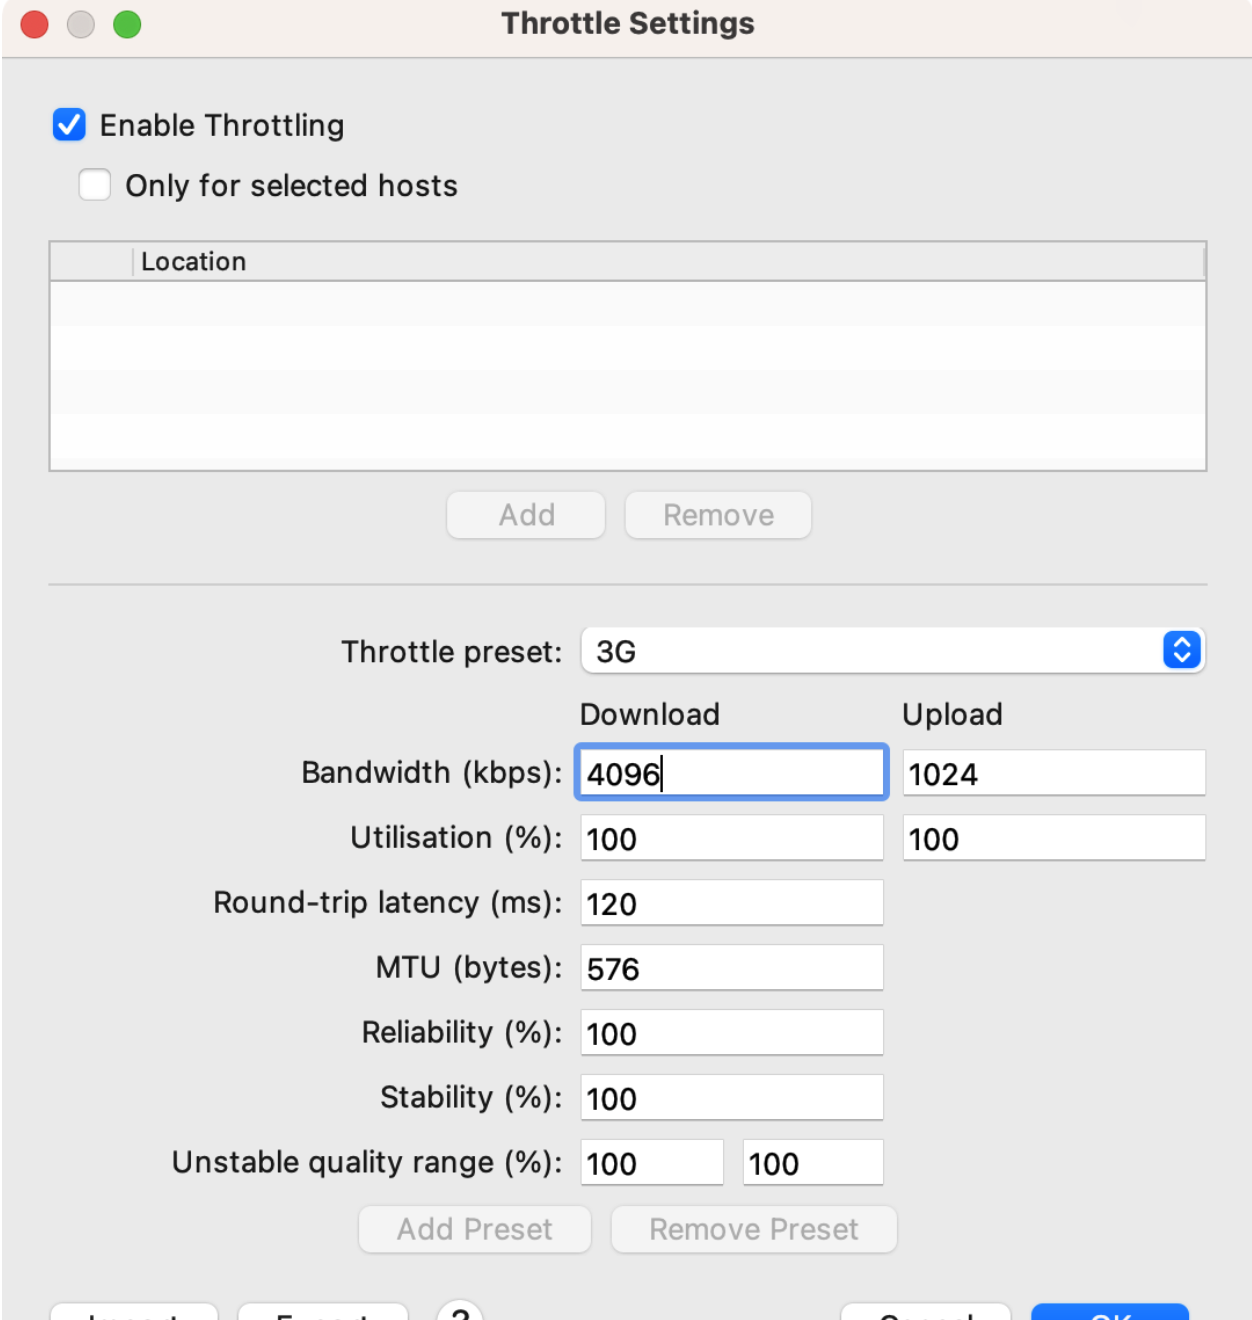
After clicking OK, you can perform a weak network test in the App.
3. Mac computer configuration weak network
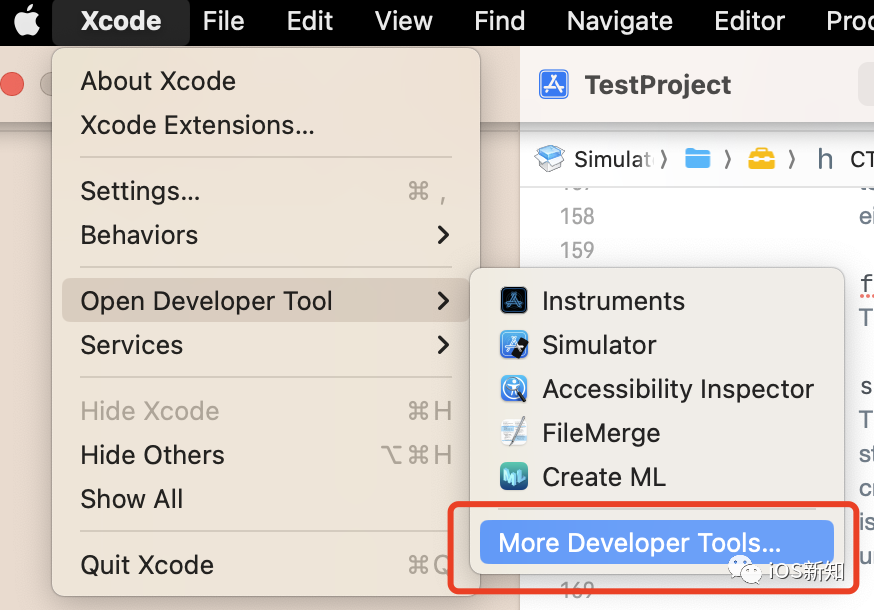
In addition to the above two methods, if you want to run tests in the simulator, you may need to simulate a weak network on your Mac. Xcode has some additional tools to do this.
Open Xcode and click on the top menu Xcode -> Open Developer Tool -> More Developer Tool. By default, the browser will open and jump to Apple’s download website https://developer.apple.com/download/all. After entering, you need to Log in to your developer account.
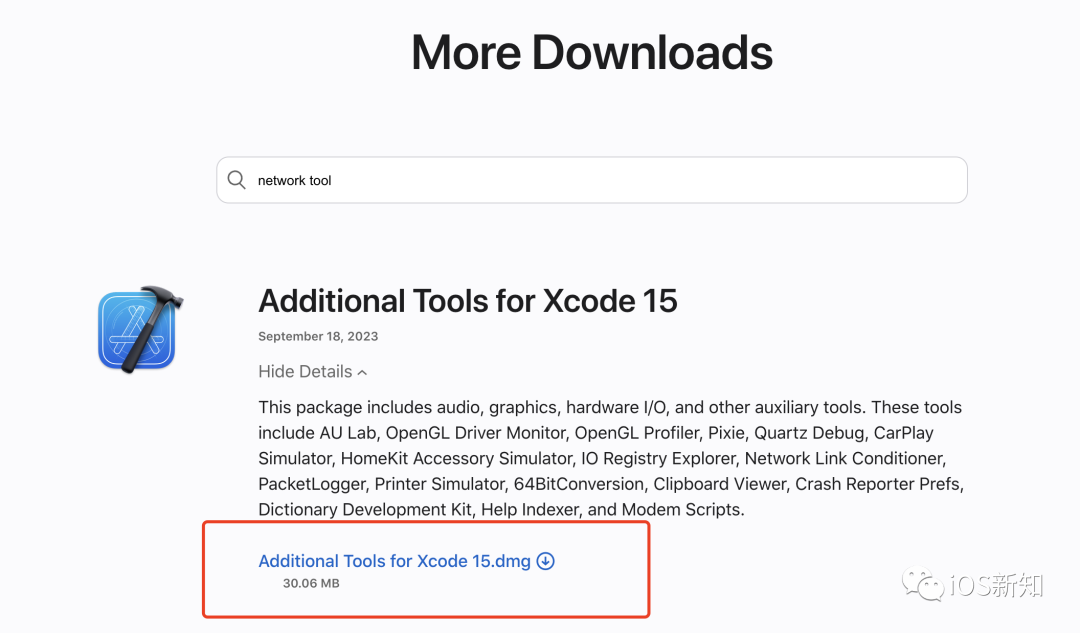
Then search for network tool in the input box. Xcode’s Additional Tools will appear in the search results. Click to download.
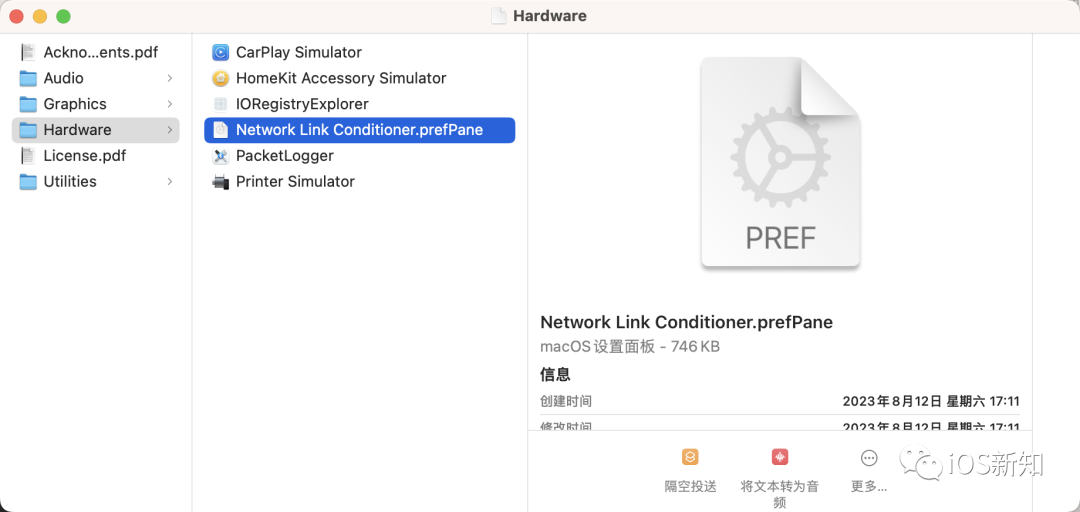
After downloading, open this file on your computer, then open the Hardware folder, and you will see the Network Link Conditioner.perfPane file. Double-click it to open it and follow the prompts to install it.
After installation, you can see more Network Link Conditioner options in the system settings. After clicking on it, you can operate the weak network in the same way as on your mobile phone.
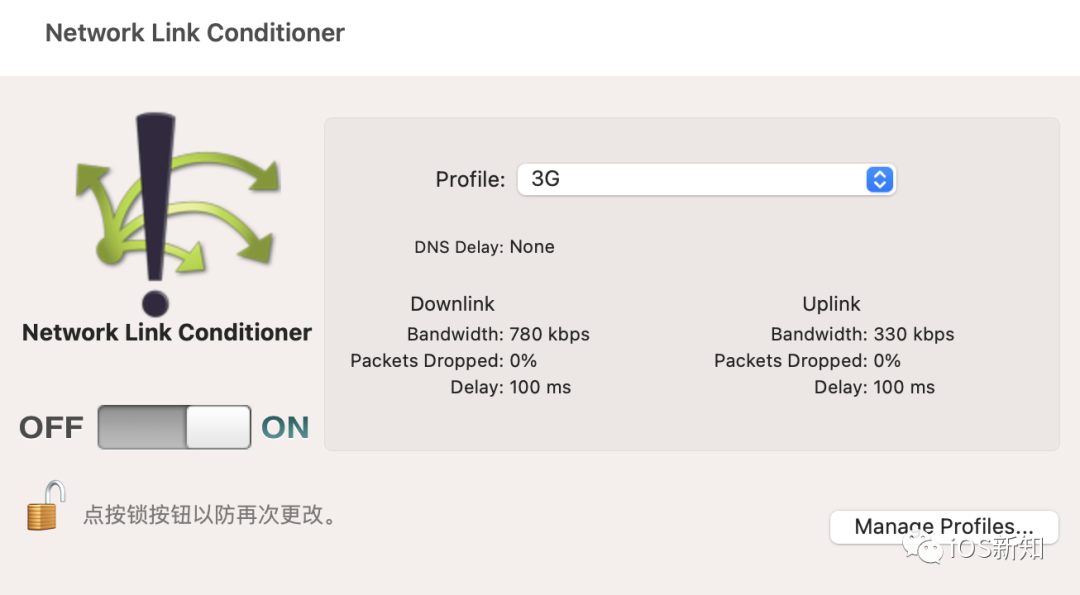
You can also manage and add customized configurations by clicking Manage Profiles in the lower right corner.